Getting Started with CodeCAD
CodeCAD is designed to be simple and developer-friendly. Here is a first and simple example modeling a knob with a hex insert, ready to be printed:
local hex_across_flats = 13 -- mm
local hex_height = 6        -- mm

local knob_diameter = 20    -- mm
local knob_height = 10      -- mm

local hex = hex_prism(hex_across_flats, hex_height)
hex = translate(hex, 0, 0, knob_height - hex_height)

local cyl = cylinder(knob_diameter, knob_height)

emit(difference(cyl, hex))
The CLI
The easiest way to begin is through the CLI tool ccad. You can always check available commands with:
ccad --help
But instead of starting from scratch, CodeCAD provides scaffolding to spin up a ready-to-use project.
Your First Project
Run the following commands in your terminal:
mkdir first_project && cd first_project
ccad init
ccad parts add
ccad live
Here’s what happens step by step:
ccad init
Creates a new project configuration (project.json) and initializes the folder. This command also sets up the Language Server Protocol (LSP) support so that your editor (e.g. Neovim, VSCode) has code completion, inline docs, and validation.ccad parts add
Adds your first part file inparts/. By default, this contains a boilerplate Lua script with a simple cube.ccad live
Starts the interactive PURE viewer. Keep it running — it automatically reloads whenever you edit your Lua files.
Your project structure now looks like this:
├── README.md
├── generated/ # STL/STEP exports go here
├── parts/ # Lua parts you define
│ └── part.lua
└── project.json # Project configuration
Open the part file in your editor:
nvim parts/part.lua
Understanding the Lua Script
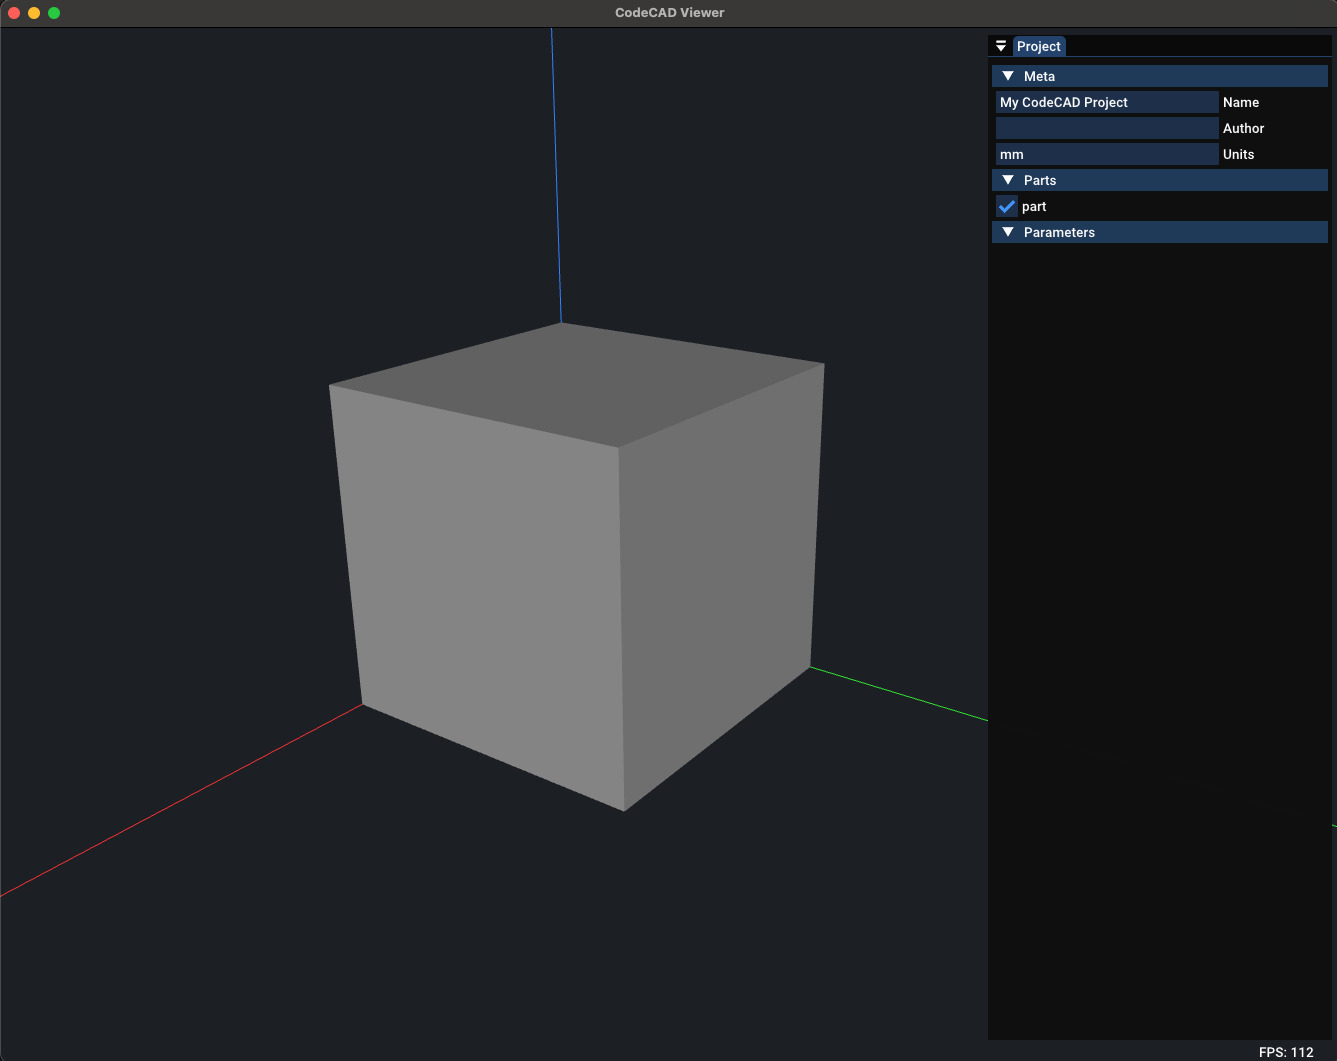
Here’s the default cube example:
local cube = box(20, 30, 40)
emit(cube)
Line by line:
box(20, 20, 20)
Creates a solid cube with width = 20mm, depth = 30mm, height = 40mm.emit(cube)
Emits the shape to the viewer and export pipeline. Think of emit as "make this visible and part of my design".
Adding More Shapes
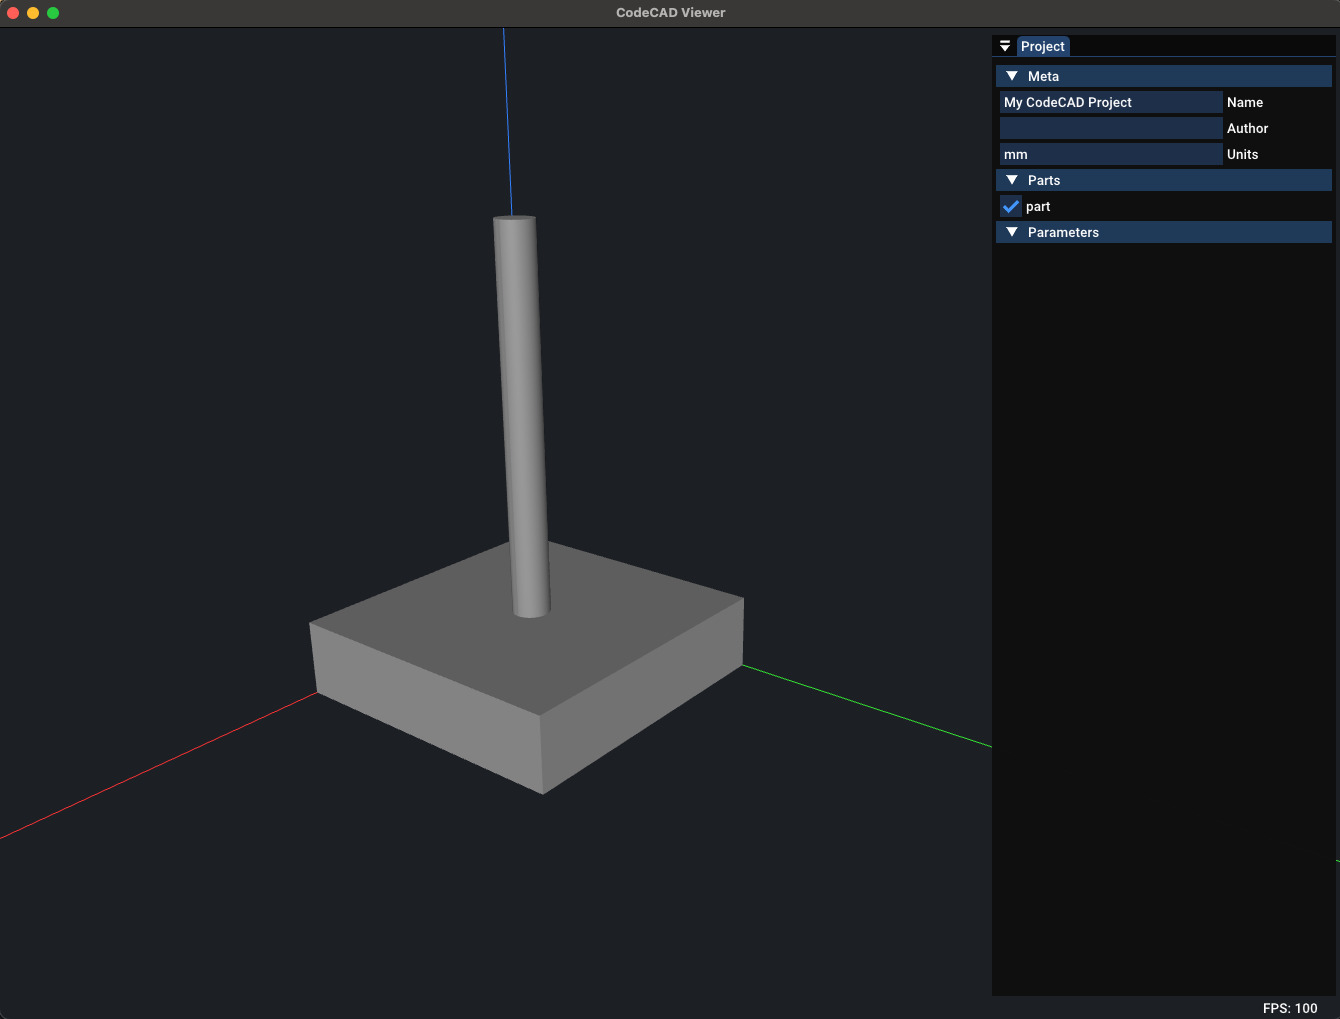
Let’s extend the part by combining shapes:
local base = box(40, 40, 10) -- A flat base plate
local pillar = cylinder(5, 50) -- A vertical pillar

-- Move pillar on top of the base and center on the cube
pillar = translate(pillar, 20, 20, 10)

local model = union(base, pillar) -- Boolean union of both
emit(model)
Now your viewer updates instantly to show a base plate with a centered pillar.
Using Functions
You can also structure your Lua code with functions to make reusable parts:
-- Create a simple bracket
local function bracket(width, height, thickness)
    local plate = box(width, height, thickness)
    local hole = cylinder(5, thickness * 2)
    hole = translate(hole, width / 2, height / 2, 0)
    return difference(plate, hole)
end

local part = bracket(30, 50, 5)
emit(part)
This creates a parametric bracket with a hole. Try editing the parameters (30, 50, 5) and watch the viewer update live.
Exporting STL/STEP
To generate STL and STEP files for your project, run:
ccad build
This command creates a separate .stl and .step file for each part and places them in the generated/ folder.
Next Steps
Now that you've built your first parts, you can:
- Explore more primitives: sphere, cone, rod, hex_prism, ... (see Primitives)
- Try boolean operations: union, difference, intersection
You are ready to start modeling with CodeCAD 🎉